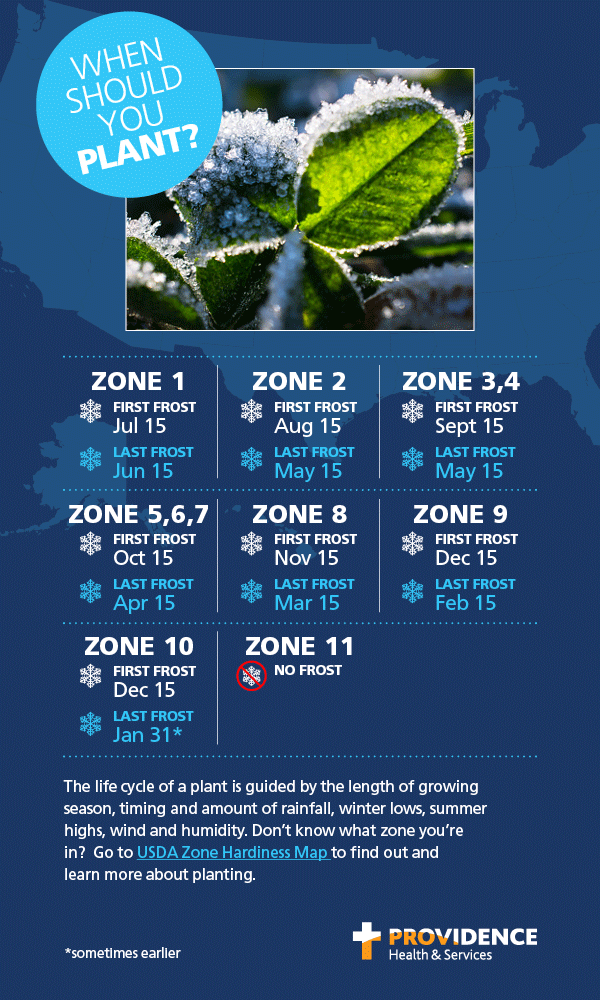
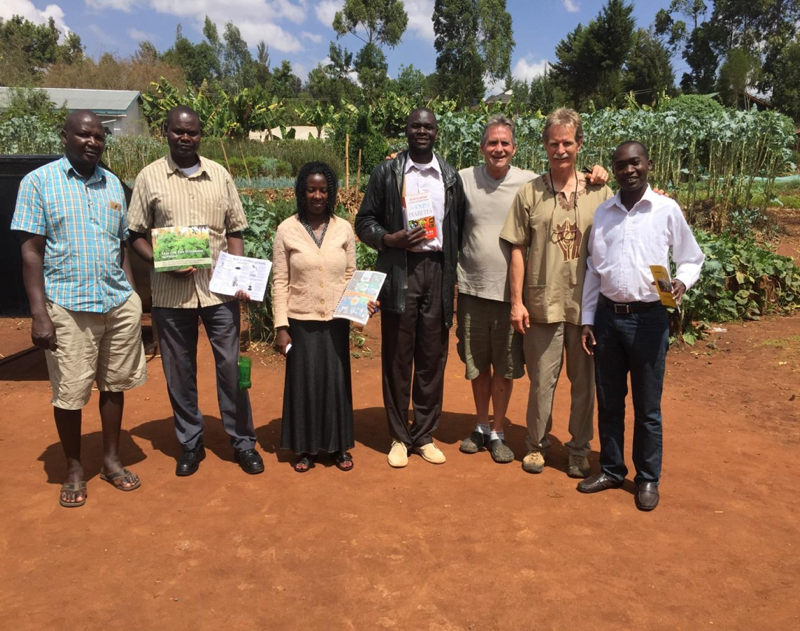
I have just returned from a month in Kenya and two weeks in India again working with Organics 4 Orphans (O4O). We are empowering the neediest of people to grow healthy food, improve their nutrition and disease resistance while generating income. Above is pictured a new partnership I facilitated with the Anglican Development Services. This alliance is most promising as we extend our reach into potentially thousands of villages and communities in Kenya and hopefully across Africa.
Below is a group of Indian men I taught in north India about 3 hours from the Nepal border. My new friend and translator, Roderick Gilbert (standing) is networked in some 5500 communities across 11 states. He is anxious for Organics 4 Orphans to return and establish a training base to begin to attack infant mortality, malnutrition, disease etc. I am feeling his tug towards the great Indian subcontinent.
The bottom picture is of one of three Kenyan prisons in which we train and equipe scores of inmates. Dale & Linda Bolton, the Canadian founders of O4O, surrounded by very appreciative ladies (and some children) are holding several of Dr. Joel Furman’s books on cutting edge health.
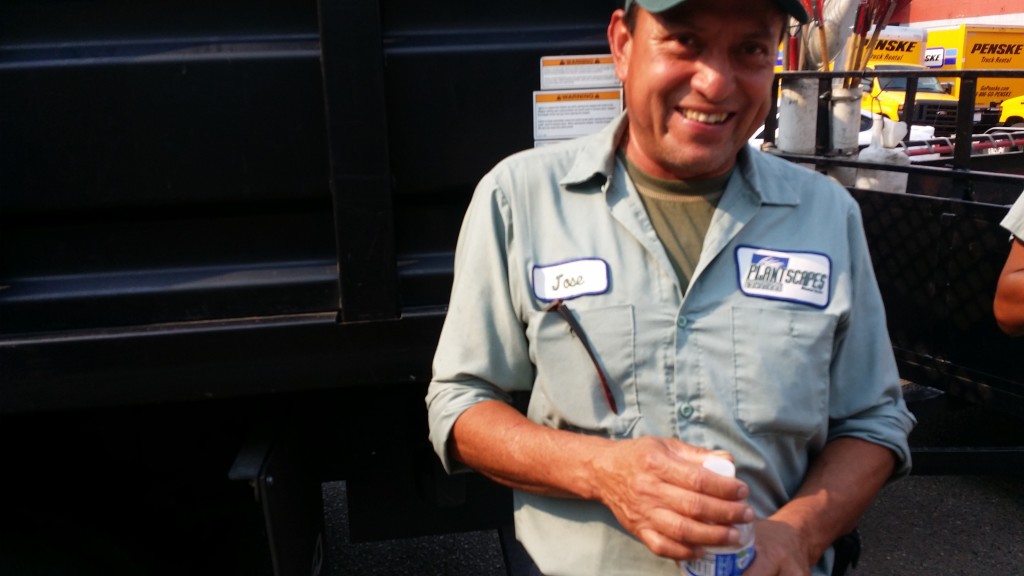
Back in the saddle here at Plantscapes, I looking forward to supporting you, our clients, with the projects and contracts we want to honor.
Within the next month I seek to follow up on each property I oversee. I would welcome scheduling a time with you to walk through your property. Please let me know what works for you.
Everyone at Plantscapes was saddened to learn of Cass Turnball's untimely death.
Many of us worked with her and learned from her over the years, and we will miss her.
Plant Amnesty will continue the work Cass began. They will honor Cass’ memory and vision and to continue the work of fulfilling PA’s mission “to end the senseless torture and mutilation of trees and shrubs through mal-pruning.” True to PlantAmnesty’s long-standing goals, we will continue to offer programs and services that (1) raise awareness of the problem of mal-pruning, (2) provide accessible solutions to the problem, and (3) engender respect for plants. In all of this, we will be animated by Cass’ indomitable spirit. We appreciate your continued support for this important work.
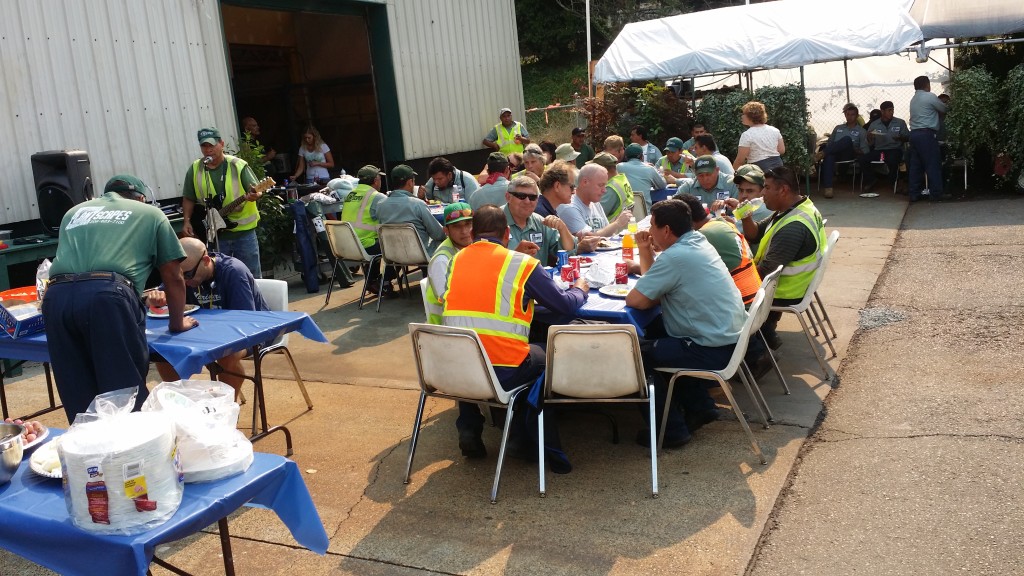
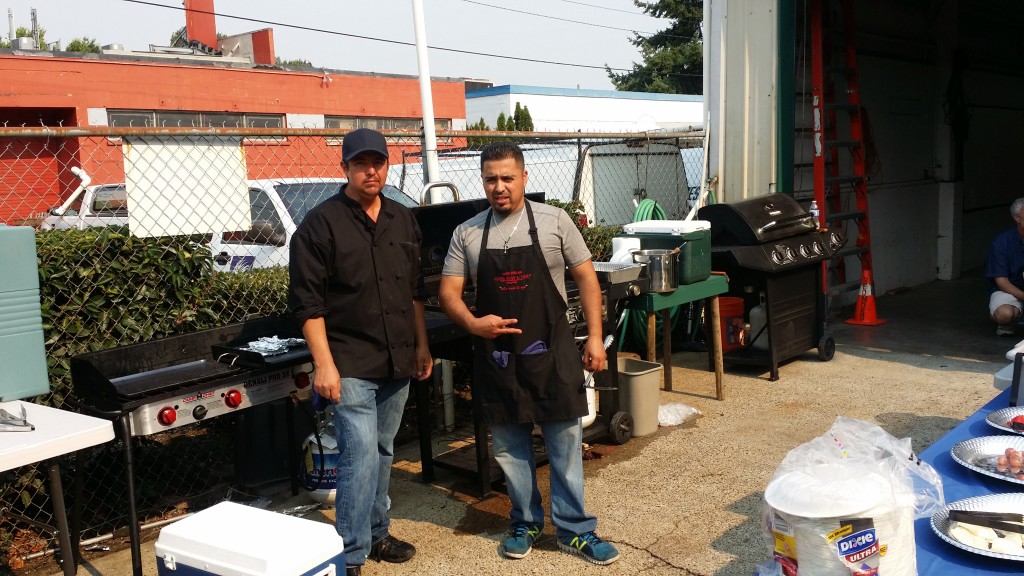
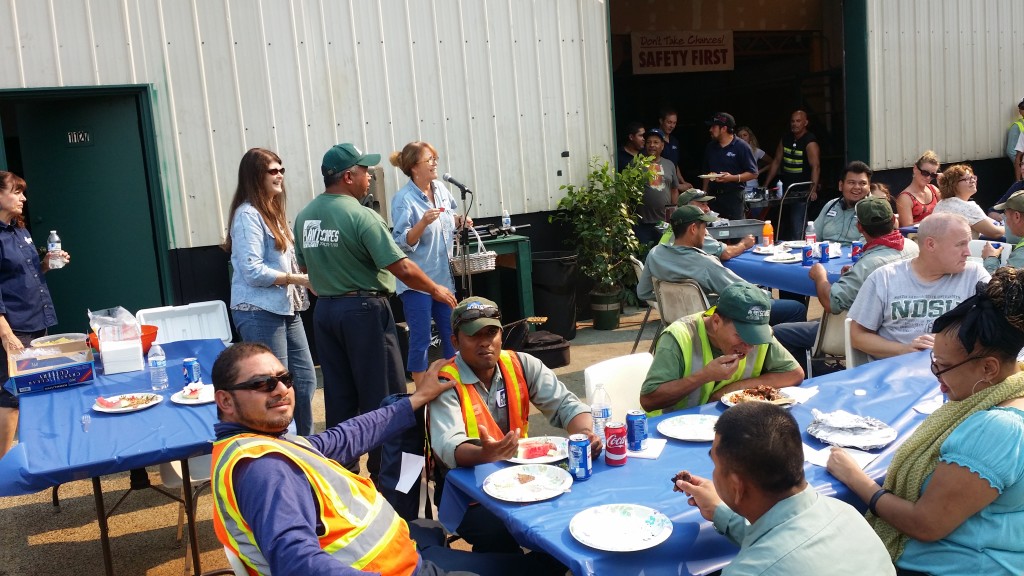
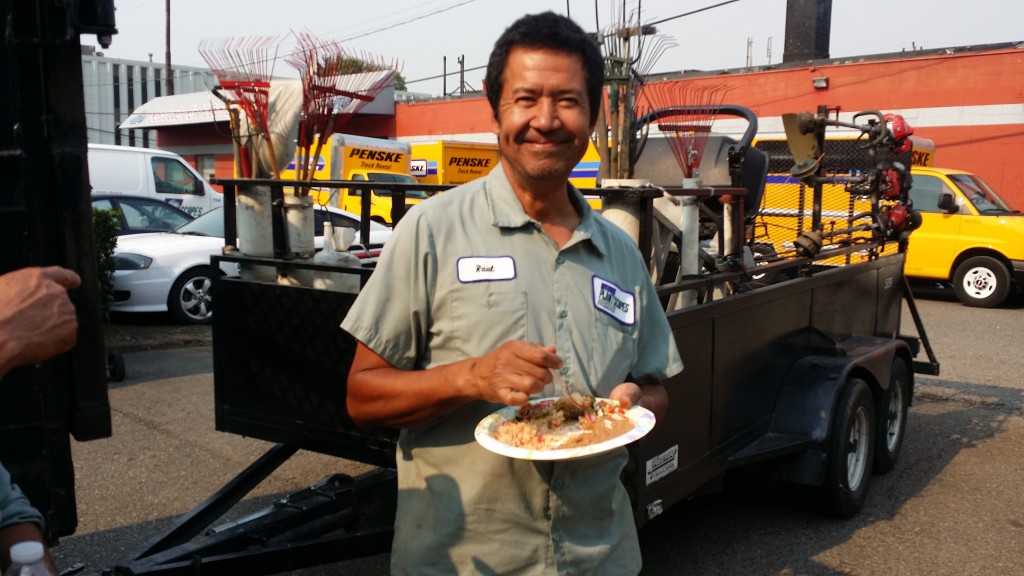
Our annual BBQ celebrating our hard work! Our team gets together to spend time together and enjoy some food our president Terry Posner has made for us! This year we had carnitas and carne asada, we had a drawing and some won some prices! Everyone had a blast and we can’t wait until next year to celebrate again!
Plantscapes’ owner, Terry Posner (right), and the Exterior Division Manager, Dustin Madden (left), were in Olympia to take part inf WALP WSNLA Legislative Day to raise awareness of the green industry’s needs and priorities and to meet with our district and state representatives.
My time here in East Africa has been going well. We are now into the third week at the Kitale, Kenya Organics 4 Orphans base. I am assisting in teaching this month long course in the biointensive gardening & natural health.
Weather here at 6000 feet is very tolerable. Great really. Here in the dry season I am not missing Seattle’s rain. But I do miss seeing all of you (except Hedley, of course). Ha.
There are about 30 students from a half dozen countries training here in equipping Africans. Since my time here 2 1/2 years ago, I now see more clearly that this program can effect change for the better.
Went to a ‘nursery’ African style last week. Interesting how many Zone 7 & 8 plants are growing here in the tropics. You Interior folks might be awed to see interior plants there growing big time outdoors here. I have an install I am working on at the comfortable guesthouse at which I am staying. Guess I can’t get away from seeing possibilities for improvement with landscapes.
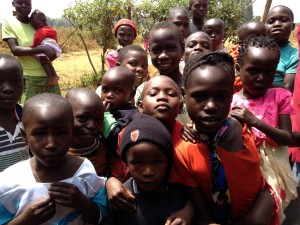
Attached is a picture of some of the local kids. They love to practice their English phrases on us ‘mahzungas’ (white folks) like “How are you?’ & ‘I am fine’ as I pass them walking to their schools and while I walk to the O4O base.
Today I learned I am invited to go to Mozambique as I had hoped to teach this course in the capital Maputo (next to South Africa). That’ll be the week after next if I can acquire a visa for Mozambique in Nairobi.Hopefully, not a problem.
Oh, a hotel/bar is going to open up their establishment for some of us North Americans here @ 2 AM Monday morning to see the SuperBowl Seahawks repeat. I am sure nobody there has been discussing this. I will be cheering from this side of the planet.
The Northwest Flower & Garden Show has been heralding the start of spring since 1989, as gardening enthusiasts from around the Northwest flock to this annual celebration, held in the beautiful Washington State Convention Center for five magical days.
Kathy Madsen, Plantscapes’ Total Quality Control Manager and Secretary And Board Member of WALP, is a co-designer of the WALP display. Many Plantscapes employees will be volunteering their time helping with the construction of the display.